
Sometimes we download Java projects from any of the website or from internet but we are unable to run that project in our system. So, here is the solution of importing the Java projects in Eclipse. As Eclipse User Interface (used for Java Coding) is little bit confusing. Generally we perform a mistake by importing the project directly in Eclipse but “The import-> Existing Projects into workspace” generally means “import Existing Eclipse Projects into workspace”. So when we browse for either directory or archive file or folder then we can’t click finish button because the import option looks for a .project file in the directory chosen by us.
So, to import existing source code that doesn’t have an eclipse project file follow the following easy steps:-
First of put the Java project in a separate folder in any of the drive. It will be helpful to browse the project while importing.
Step 1:- Open Eclipse.
Step 2:- Create a new Empty Java Project into the Workspace (File->New->Project).
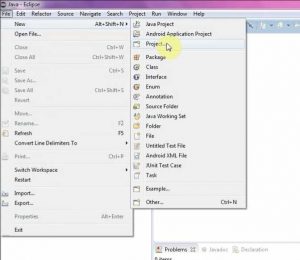
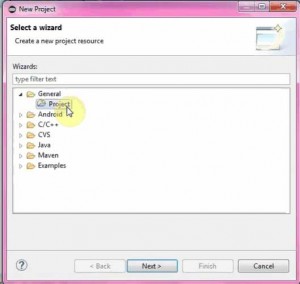
Step 3:- Select General and then Project.
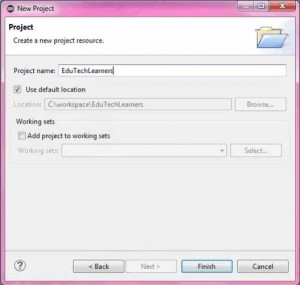
Step 4:- Write the project Name.
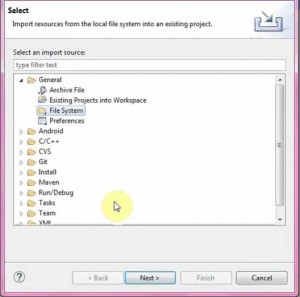
Step 5:- Now right click on the source folder and choose (import->General->File System).
Step 6:- Choose your files or browse your file from the system.
Step 7:- Now open .java file & edit (or run).
Follow these simple steps to import an existing Java project in eclipse. Enjoy running your projects.
Watch it on YouTube:-

If you wants some more info on any of the topics please mail to us or comment below. We will provide you as soon as possible and if you want your’s post to be published on our site then feel free to register on EduTechLearners.


